
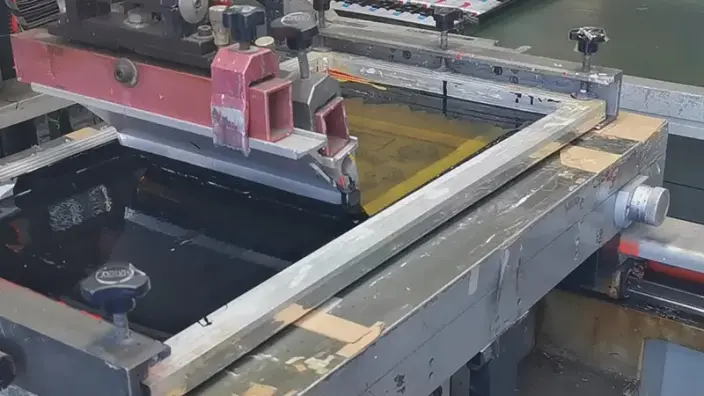
A silicone print must be evaluated as a combination of substrate, surface preparation, ink, cure and intended use. A print that looks correct immediately after printing is not enough evidence of adhesion or durability in service.
This guide focuses on compatibility and troubleshooting. For the buyer’s artwork package, quotation inputs and production approval sequence, read silk screen printing on molded silicone products: the complete steps.
What must be compatible before printing?
Identify the actual molded silicone, including its grade, colour, finish and any release agent or surface treatment. Then ask the ink supplier to confirm suitability for that substrate and intended use. “Silicone ink” is not a complete processing specification.
| Item | Information to obtain before a trial |
|---|---|
| Substrate | Material designation, molded finish, part geometry and prior processing |
| Ink system | Product designation, required components, mixing instructions and usable working time |
| Preparation | Approved cleaner or treatment and handling instructions |
| Printing setup | Artwork, screen, fixture and registration requirements |
| Cure | Supplier-specified process and a way to verify that the part receives it |
| Use conditions | Flexing, rubbing, cleaning, contact materials and other relevant exposures |
Keep the current technical data sheet and safety data sheet for the selected ink. Do not substitute a general internet recipe for them. This article does not specify an ink brand or claim that a particular system is used on SANNYIN orders.
Which curing method should you use?
Use the method specified for the selected ink system. Heat curing, UV curing and air drying are not interchangeable alternatives simply because they occur in other printing processes. Confirm the chemistry, equipment and substrate compatibility before approving a route.
For a heated process, confirm the required exposure and how the actual part will receive it. An equipment setting by itself does not document the temperature history of every printed part. For other systems, obtain the corresponding supplier instructions and verification method rather than assuming they work on silicone.
Do not transfer a silicone rubber’s material temperature rating to an ink’s cure schedule. Shin-Etsu’s silicone rubber properties guide discusses the substrate material’s behaviour with temperature and exposure time; it is not an ink technical data sheet.
How do you investigate a printing defect?
Treat the following as possible investigation paths, not a diagnosis. Keep the substrate and ink batches identifiable, record the settings and change one factor at a time in controlled trials.
| Observed problem | Questions to investigate | Evidence before approving a change |
|---|---|---|
| Print lifts or peels | Is the ink suitable? Is the surface prepared as specified? Was mixing and curing documented? | Comparison samples and an agreed adhesion check after the specified cure/conditioning |
| Print cracks during flexing | Does the system suit the intended deformation? Does the artwork cross a highly strained area? | Samples tested under the intended movement and inspection conditions |
| Colour or opacity varies | Are mixing, substrate colour, deposited film and screen condition consistent? | Side-by-side samples against an approved physical colour reference |
| Edges blur or fine features disappear | Are the artwork, screen, ink condition and print area suitable for the requested detail? | A revised trial print on the actual part, checked against the approved drawing |
| Colours are misregistered | Is the part located consistently? Are the fixture and print sequence controlled? | Registration checks on representative parts |
| Print changes after cleaning | Was the cleaning agent and exposure included in validation? | A test using the agreed cleaning conditions and acceptance criteria |
Do not respond to every defect by increasing heat, adding solvent or changing a mixing ratio. Check the ink instructions and the recorded process first. Changes to the substrate, cleaner, ink or cure require a new comparison with the approved sample.

What should a validation record contain?
Record the drawing and artwork revision, substrate identity, ink and component batches, preparation, printing setup, cure conditions, test method and results. Define the acceptable colour, registration, appearance and durability before testing.
The intended application determines the checks. A decorative mark, a frequently flexed part and a product exposed to cleaning do not automatically need the same test. Food-contact, child-use or medical claims need separate evidence applicable to the finished item; attractive printing does not prove those requirements are met.
Keep an approved sample and identify the production changes that require reapproval. This is a suggested validation structure, not a claim that any example in this article has passed a named test.
What should you send when requesting help?
Provide the drawing, actual material, artwork, ink documents if known, current process record, photographs of the defect and the conditions under which it appears. Include both failed and acceptable samples where available.
Use the production steps and RFQ checklist to prepare a new project, or contact SANNYIN with the evidence for an existing printing issue.
Revision note: Reorganized this guide around compatibility, controlled troubleshooting and documented validation; removed unsupported universal curing options, durability promises and generic application claims.